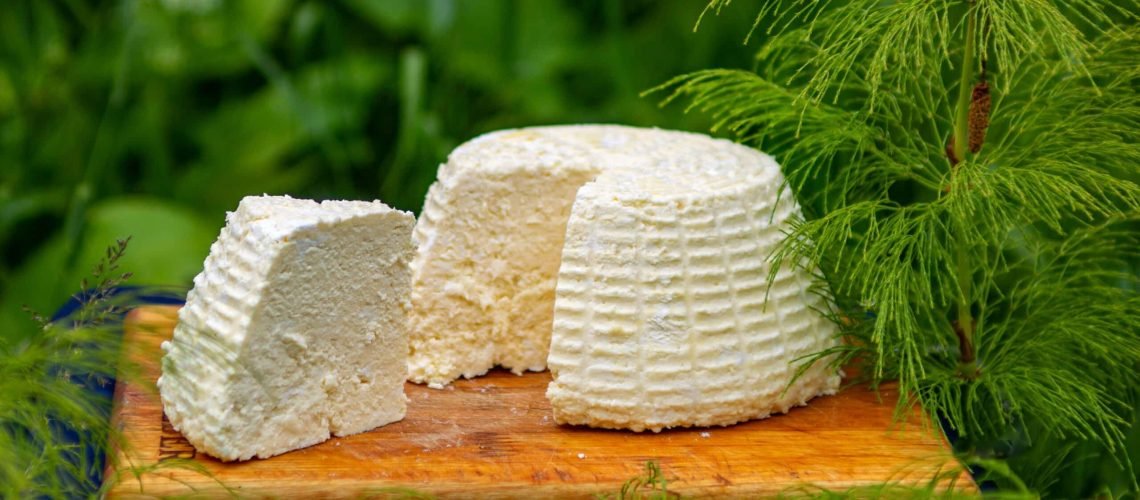
Making homemade cheese is a delightful and satisfying process that requires just a few basic ingredients and some patience. Whether you’re a beginner or an experienced chef, you can create delicious, fresh cheese right in your own kitchen. Follow this step-by-step guide to make your own homemade cheese!
🧀 What You’ll Need
🛒 Ingredients:
- Milk: 1 gallon (3.8 liters) of whole milk (preferably non-homogenized and locally sourced)
- Acid: 1/4 to 1/2 cup (60-120 ml) of lemon juice, vinegar, or citric acid solution
- Salt: 1-2 teaspoons (5-10g) of non-iodized salt (optional, for flavor)
- Rennet: 1/4 tablet or 1/4 teaspoon (if using liquid rennet) – Optional for firmer cheeses
🔧 Equipment:
- Large stainless steel pot
- Thermometer (to monitor temperature)
- Cheesecloth or butter muslin
- Colander or strainer
- Slotted spoon
- Optional: Cheese molds, weights, and a cheese press for firmer cheeses
🏡 Step-by-Step Guide to Making Homemade Cheese
🕑 Step 1: Heat the Milk
- Pour Milk: Pour the milk into a large stainless steel pot. Stainless steel is preferred because it doesn’t react with the acid.
- Heat Gently: Slowly heat the milk over medium-low heat, stirring gently to prevent scorching. Heat the milk to around 86°F-90°F (30°C-32°C) for soft cheeses or 90°F-100°F (32°C-38°C) for firmer cheeses.
⚗️ Step 2: Add Acid or Rennet
- Acid Option: For soft cheeses like paneer or ricotta, add lemon juice, vinegar, or citric acid solution to the milk. Stir gently to combine.
- Rennet Option: For firmer cheeses, dissolve rennet in a small amount of cool water and add it to the milk. Stir gently to distribute evenly.
⏳ Step 3: Let the Milk Set
- Curdling: Allow the milk to sit undisturbed for 10-30 minutes, or until it begins to coagulate and form curds. The milk should start to thicken and separate into curds (solids) and whey (liquid).
- Check for Clean Break: For rennet-based cheeses, check for a “clean break” by inserting a knife into the curd at a 45-degree angle and lifting it straight up. If the curd breaks cleanly, it’s ready.
🔄 Step 4: Cut the Curd
- Cutting: Using a long knife or curd knife, cut the curd into 1/2-inch to 1-inch cubes. This helps release more whey from the curd.
- Rest: Let the curds rest for about 5-10 minutes to allow more whey to drain.
💪 Step 5: Stir and Heat the Curds
- Stir Gently: Slowly stir the curds with a clean spoon to keep them from matting together.
- Heat (Optional): For firmer cheeses, gradually raise the temperature to around 100°F-102°F (38°C-39°C) over 30 minutes, stirring gently.
🧀 Step 6: Drain the Curds
- Line Colander: Line a colander or strainer with cheesecloth or butter muslin.
- Transfer Curds: Using a slotted spoon, carefully transfer the curds into the lined colander. Allow the whey to drain off.
- Press Gently: For soft cheeses, gently press the curds to remove excess whey. For firmer cheeses, use a cheese press or weights to apply pressure.
🧂 Step 7: Salt the Cheese
- Add Salt: Sprinkle salt over the curds and gently mix to distribute evenly. Salt enhances flavor and helps with preservation.
- Taste Test: Taste the cheese and adjust the salt if needed.
🍴 Step 8: Shape and Store
- Shape Cheese: For soft cheeses, transfer the curds into a mold or shape by hand. For firmer cheeses, press the curds into a mold and apply weight.
- Drain Further: Allow the cheese to drain for several hours or overnight in the refrigerator.
- Store: Store the cheese in an airtight container in the refrigerator for up to a week for soft cheeses or longer for aged cheeses.
💡 Tips for Success:
- Milk Quality: The quality of your milk greatly affects the final cheese. Fresh, locally sourced, non-homogenized milk gives the best results.
- Temperature Control: Maintaining the correct temperature is crucial for proper curd formation and whey separation.
- Cleanliness: Ensure all utensils and equipment are thoroughly cleaned to prevent contamination.
- Patience: Cheesemaking is a slow process; allow ample time for each step to ensure the best results.
🧀 Optional: Customize Your Cheese
- Herbs and Spices: Add herbs, spices, or garlic during the salting stage for flavored cheeses.
- Aging: For firmer cheeses, consider aging them in a controlled environment to develop more complex flavors.
🎉 Enjoy Your Homemade Cheese!
Making cheese at home is a rewarding experience that allows you to create unique flavors and textures. Whether you prefer soft, creamy cheeses or firmer varieties, this guide will help you craft delicious homemade cheese with just a few ingredients. Happy cheesemaking!


