
Discover how to make apple cider vinegar at home with this comprehensive step-by-step guide. Making your own apple cider vinegar allows you to create a natural, organic health elixir without the questionable additives found in many store-bought versions. Homemade apple cider vinegar offers superior flavor, customizable acidity, complete control over ingredients, and the profound satisfaction of mastering the ancient art of fermentation. Whether you’re a health enthusiast, culinary adventurer, or sustainable living advocate, this DIY apple cider vinegar tutorial will walk you through the entire process from choosing apples to bottling your finished vinegar.
What is Apple Cider Vinegar and Why Make It at Home?
Apple cider vinegar (ACV) is the product of a two-stage fermentation process that transforms fresh apple juice first into hard cider (alcoholic fermentation) and then into vinegar (acetic acid fermentation). The resulting tangy, amber-colored liquid contains beneficial probiotics, enzymes, and acetic acid – particularly when it includes the “mother,” a colony of beneficial bacteria that appears as a cloudy substance in raw, unfiltered vinegar.
Making apple cider vinegar at home offers numerous benefits:
- Complete transparency about ingredients and processing methods
- Freedom from preservatives, artificial colors, and flavor enhancers
- Significant cost savings compared to premium organic brands
- Customizable flavor profile based on apple varieties and fermentation time
- Sustainable solution for using apple scraps and reducing food waste
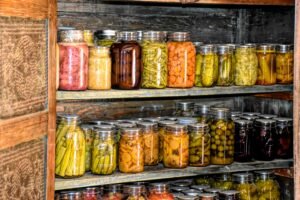
- Connection to traditional food preservation techniques
Essential Ingredients and Equipment for Homemade Apple Cider Vinegar
Before diving into the fermentation process, gather these necessary ingredients and equipment to ensure a successful batch of homemade apple cider vinegar.
Ingredients for DIY Apple Cider Vinegar:
- Apples or Organic Apple Scraps: Approximately 3-4 medium apples or 2-3 pounds of cores and peels. Organic apples are strongly recommended to avoid pesticide residues that could inhibit fermentation.
- Filtered Water: Non-chlorinated water is essential as chlorine can kill the beneficial bacteria necessary for fermentation.
- Sugar (Optional but Recommended): 1/4 cup raw organic cane sugar to provide food for the yeasts during initial fermentation.
- Raw, Unpasteurized Apple Cider Vinegar with the “Mother” (Optional): 1/4 cup to serve as a starter culture, significantly accelerating the second fermentation stage.
Equipment for Making Apple Cider Vinegar:
- Large Glass Jar: Half-gallon or gallon size, never metal or plastic as these can react with the acidic mixture.
- Breathable Covering: Cheesecloth, coffee filter, or breathable fabric (like muslin or a nut milk bag) to allow airflow while keeping out contaminants and fruit flies.
- Rubber Band or Jar Ring: To securely fasten the cloth covering.
- Glass Bottles: With tight-fitting lids for storing the finished vinegar.
- Airlock (Optional): For a more controlled first fermentation process.
The Complete Apple Cider Vinegar Fermentation Process: Step-by-Step Guide
Making apple cider vinegar at home involves two distinct fermentation stages that transform fresh apples into tangy, probiotic-rich vinegar. Follow these detailed steps for successful homemade apple cider vinegar production.
Preparing Your Apples for Fermentation
- Thoroughly wash all apples, even organic ones, to remove any surface contaminants.
- Cut apples into approximately 1-inch pieces (precision isn’t necessary).
- If using apple scraps, inspect carefully and discard any with mold or signs of decay.
Stage 1: Alcoholic Fermentation (Creating Hard Cider)
- Place apple pieces or scraps and sugar (if using) into your clean glass jar.
- Pour filtered water over the apples, leaving 2-3 inches of headspace at the top.
- Stir thoroughly to dissolve the sugar and distribute the natural yeasts.
- Cover the jar opening with cheesecloth or breathable fabric, securing it tightly with a rubber band.
- Store the jar in a dark location at room temperature (ideally 68-75°F/20-24°C), away from direct sunlight and temperature fluctuations.
- Stir the mixture daily for the first week, then every other day afterward to distribute yeasts and prevent mold formation.
During this stage, look for visual indicators of successful fermentation: bubbling activity, a mild alcoholic aroma developing, and the apple pieces gradually sinking to the bottom of the jar. This stage typically requires 2-4 weeks, with warmer temperatures accelerating the process. The first stage is complete when the liquid tastes slightly alcoholic and sweet, and bubbling has noticeably decreased.
Stage 2: Acetic Acid Fermentation (Transforming Hard Cider into Vinegar)
- Strain the liquid through cheesecloth into a clean glass jar, discarding the solid apple material.
- Add the raw apple cider vinegar “mother” if using, to introduce beneficial bacteria and speed up the process.
- Cover the jar opening with fresh cheesecloth or breathable fabric, securing it tightly.
- Return the jar to its dark, room-temperature location.
- During this stage, minimize disturbance – avoid stirring except to gently break up any film forming on the surface.
In this second fermentation stage, you’ll observe the formation of the “mother,” appearing as a gelatinous disc floating on top of the liquid. This is a beneficial bacterial colony and indicates healthy fermentation progress. This stage requires significant patience, typically taking 3-6 weeks minimum, but often extending to 2-3 months or longer for full vinegar development and optimal acidity.
Testing, Bottling, and Storing Your Homemade Apple Cider Vinegar
- Begin taste testing after 3-4 weeks, looking for a sharp, tangy, distinctly vinegary flavor.
- Once your desired acidity level is reached (a matter of personal preference), the vinegar is ready.
- Optionally strain the vinegar through multiple layers of cheesecloth or a fine-mesh sieve to remove sediment.
- Transfer the finished vinegar to clean glass bottles with tight-fitting lids.
- For longer shelf stability, consider pasteurization by gently heating the vinegar to 140°F (60°C) for 30 minutes (do not boil).
- Store bottles in a cool, dark location such as a pantry or cupboard.
Properly stored homemade apple cider vinegar can remain shelf-stable for years, often continuing to develop more complex flavors over time.
Troubleshooting Your DIY Apple Cider Vinegar: Expert Tips for Success
Even experienced fermenters occasionally encounter challenges. Here are proven strategies for troubleshooting common issues and professional tips to ensure your homemade apple cider vinegar turns out perfectly every time.
Pro Tips for Perfect Homemade Apple Cider Vinegar:
- Prioritize Cleanliness: Thoroughly sanitize all equipment to prevent contamination from unwanted bacteria.
- Choose Organic Apples: Organic apples yield better fermentation results and enhance both flavor and health benefits.
- Embrace Natural Cloudiness: Cloudiness in your finished vinegar is completely normal and often indicates a higher concentration of beneficial compounds.
- Maintain Optimal Temperature: Keep fermentation within the ideal range of 68-75°F (20-24°C) for consistent results.
- Practice Patience: Fermentation is a natural biological process that cannot be rushed – allow sufficient time for complete development.
Common Apple Cider Vinegar Problems and Solutions:
- Mold Growth: If you observe any fuzzy or colorful growth (different from the flat, whitish mother), discard the entire batch as mold can produce harmful toxins.
- Kahm Yeast: A harmless white film that sometimes develops; simply skim it off the surface and continue fermentation.
- Sluggish Fermentation: Try moving to a slightly warmer location, adding more sugar at the beginning stage, or introducing a “mother” from raw apple cider vinegar.
- Insufficient Acidity: Allow more fermentation time, ensure adequate temperature, or consider starting with higher sugar content in your next batch.
- Fruit Fly Infiltration: Secure cheesecloth more tightly and consider placing the jar inside a paper bag for additional protection.
Versatile Uses for Your Homemade Apple Cider Vinegar
Homemade apple cider vinegar offers remarkable versatility beyond basic culinary applications. Discover the diverse ways to incorporate your DIY vinegar into your kitchen, household, and wellness routines.
Culinary Applications for Homemade Apple Cider Vinegar:
- Vibrant Salad Dressings: Create signature vinaigrettes by combining with quality oils, herbs, and seasonings.
- Tenderizing Marinades: The natural acids break down proteins, perfect for tougher cuts of meat.
- Flavorful Sauces and Chutneys: Add depth and tanginess to homemade condiments.
- Healthful Beverages: Dilute with water, honey, and lemon for a refreshing daily tonic.
- Cooking Enhancement: A splash brightens soups, stews, and sautéed vegetables.
Household Uses for Apple Cider Vinegar:
- Natural Cleaning Solution: Dilute with water for an eco-friendly surface cleaner.
- Hair Care: A diluted rinse can remove product buildup and add shine.
- Garden Helper: Higher-acidity vinegar can serve as a natural weed suppressant on patios and walkways (avoid contact with desired plants).
- Fruit and Vegetable Wash: A diluted solution helps remove residues from produce.
Wellness Applications (Use with Appropriate Caution):
- Skincare: Highly diluted vinegar may help with minor skin issues; always perform a patch test first.
- Pet Care: After veterinary consultation, diluted vinegar can address certain external pet issues.
- Digestive Support: Many people incorporate small amounts into their wellness routines for potential digestive benefits.
Conclusion: Master the Art of Homemade Apple Cider Vinegar
Learning how to make apple cider vinegar at home connects you to an ancient tradition of food preservation while providing a superior product that outshines commercial alternatives. The complete control over ingredients, enhanced flavor profile, significant cost savings, and personal satisfaction make homemade apple cider vinegar well worth the effort.
Now equipped with this comprehensive knowledge of the apple cider vinegar fermentation process, you’re ready to create your first batch. Don’t hesitate to experiment with different apple varieties or infuse your vinegar with herbs and spices for unique flavor profiles. The possibilities are endless!
Begin your homemade apple cider vinegar journey today and experience the transformative power of this versatile fermented elixir. Your kitchen, health routine, and household will never be the same!